Now that we have this brand new BEAUTIFUL art room, I wanted to take some time to show it off!
I honestly don't know who is more excited to be here- myself or the kids. (Probably me ;) )
We've lived in it for 2 weeks now, so I've found some things that work great- and others that I've already changed!
Here's some overview pictures. Then I will highlight a few different areas.
It was cloudy the day I took these pictures- you should see all the NATURAL LIGHT that comes in on sunny days! Ahh!!
Here is the view of my board and Smart Projector. I'm loving the options I have to use it as a regular white board or to use the projector just to show my computer screen or to use the interactive features!
You might be wondering why I took a picture of the door. But I actually wanted to point out the little picture of Mona Lisa posted right next to the door. When students are in line I ask them to "Show me your Mona Lisa!" That means they strike their best Mona Lisa pose: hands in front of them, eyes forward, mouths closed, and maybe a little smile because they love art class ;)
It works so well as a way to quiet down and focus students when they are in line!
I love having these caddies on the tables! In them I keep 4 glue bottles, 4 scissors, 4 pencils, 2 erasers, and some crayons. This keeps students from constantly having to get up to get simple supplies.
There are 4 students at each table so they know there should be enough supplies for everyone. Students also check at the end of class to make sure they've got 4, 4, and 4!
(This trick keeps my pencils from being stolen.)
Each table's caddy is labeled with a different color.
So I can call them by tables for different activities.
Nothing super special about our cleaning supplies- except that the students are learning great responsibility in cleaning up after themselves. I don't spend 5 minutes between each class frantically running around and cleaning the tables because the students take care of that before they leave!
We also try to keep our floors relatively clean.
Anything to make our wonderful janitor's job easier! ;)
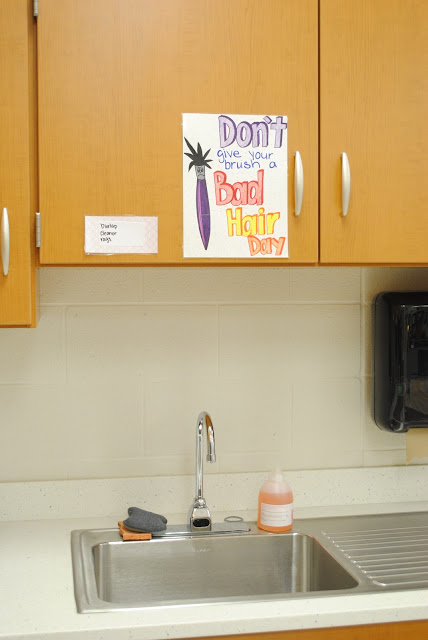
This just shows one of our sinks along with a sign I made about
not giving your brush a "bad hair day".
I LOVE THIS CABINET! It that odd? Oh well. :)
It's just great! I labeled the tubs with the different teachers names and this is where we store student artwork. This makes it easy to grab quick in between classes. If I don't have time to get them out before the students come, it's also easy to say "Hey Johnny, can you go grab your classes work?" Clearly labeled. Easy access. Love it.
My art history timeline was too long for the wall I used, so it starts around the corner here.
Also, here's a few color wheels I made using paint chips.
And another sign I made "Draw LIGHT until you've got it RIGHT!"
Here you can see the rest of my art history timeline (a few fell down and need stuck back up..oops).
This bulletin board I focused mainly on color.
Color wheels, tints, tones, shades, and color harmonies!
I also have a schedule hanging here with the teachers names that I rotate each day. That way I always know which class is coming next.
I think I'm going to use the far right of the board for project examples, featured student work, or famous artists we are learning about. We'll see what it turns into.
This shelf is where the majority of student supplies are kept.
Markers (thick and thin), colored pencils, oil pastels, chalk pastels, more crayons, etc..
This keeps the supplies within reach of all students!
Art jobs. The students do so well at these!
I have 4 art jobs:
Project patrol:helps pass out/collect artwork
Materials Manager: Gets extra art materials needed that aren't already on the tables
Cleaner Sprayer: Use the spray bottles to spray the tables (3 times) when we do messy projects
Cleaner Wiper: Wipes up the sprays with a rag
Sometimes I'll adjust the responsibilities of each job as needed, but overall, these work great for us!
This is how students know what job is theirs. Fabric on the backs of their chairs! I rotate the jobs on the board so they just find their color and instantly know what their job is!
This is our reward game board! If students behave (no one gets an "X" and overall the class does well) then they get to move their game piece! I choose a student to come pick out a crayon box from the top. Inside the box there is a paper that says "move ahead 1, 2, or 3". The students then move their classes game piece to their new space. The first class to make it to the end wins an ART PARTY!!!!!!
This is the turn-in tray as well as the "No Name" bin. Pretty self explanatory.

This file system has helped me a ton! I can easily grab a classes file as they come in. Inside I keep a seating chart and any other papers they need to use that day.
And I couldn't conlcude the tour without showing off our STUNNING display cases!
6th grade value ribbons are currently on display.
Well- that's all I've got for you! Please feel free to contact me and ask any questions you have.
So far I am LOVING the new art room and can't wait to see everything the students create!!!
Keep Creating!
-Mrs. Hartford


